Quick MAVLink Introduction
MAVLink (Micro Air Vehicle Link) is a very lightweight and awesome messaging protocol for communication between unmanned vehicle and Ground Control Station (GCS). MAVLink can also be used for inter-communication between sub system components on a drone.
It is very powerful and easy to use header-only C library. Since MAVLink is only a protocol, it is Transport and Network layer agnostic. In other words, we can use Serial via cable or radio or any kind of Network protocol like UDP or TCP to transmit or receive MAVLink messages.
MAVLink comes with standard message definitions as minimal.xml, standard.xml or common.xml that includes the previously mentioned ones. If a MAVLink message doesn’t fit your needs, you can write your own message definition called dialect.
Backstory
For an old Rover project I came up with a very simple 8 byte UDP packet structure like this:
1
2
3
4
5
6
7
8
9
struct {
  uint16_t header;
  uint8_t sequence;
  uint8_t payload1;
  uint8_t payload2;
  uint8_t payload3;
  uint8_t payload4;
  uint8_t footer;
}
This was more then sufficient for a small project like a manually controlled Rover. Few years later we wanted to add new features like GPS, IMU, mission planning and write our own GCS for desktop environments.
So, why not to take a look into incredible projects like ArduPilot and their way to handle messages and telemetry. Unfortunately ArduPilot’s sourcecode was overwhelming and scraping of the MAVLink part which was (back then) not an easy task for me either.
In the beginning it seemed to be difficult and I couldn’t wrap my head around. So I put the MAVLink idea by side and decideD to write my own enhanced MAVLink-esque protocol.
As sturborn as I am, I really made an decent working proof-of-concept and wrote an Electron based GCS.

Exploring MAVLink
A big inspiration for my own protocol came through MAVLink. It was still a good reference point even with the trouble I had.
When I want to learn something new, I usually try to break it down into small and easy digestable chunks.
With that approach, things started to make slowly more sense. After understanding the MAVLink messages and microservices better, I gave it another try.
I found some good step-by-step tutorials and example sourcecodes.123456
1
uint8_t mavlink_parse_char(uint8_t chan, uint8_t c, mavlink_message_t* r_message, mavlink_status_t* r_mavlink_status)
The main focus lies on mavlink_parse_char(). This function is responsible for parsing every incoming byte at a time and returns the message if the packet is decoded successfully.
1
2
3
4
5
6
7
8
9
10
11
12
13
14
15
void parse_mavlink(uint8_t parsing_byte) {
  mavlink_message_t mvl_rx_message;
  mavlink_status_t status;

  if (mavlink_parse_char(MAVLINK_COMM_0, parsing_byte, &mvl_rx_message, &status)) {
    switch (mvl_rx_message.msgid) {
      case MAVLINK_MSG_ID_HEARTBEAT:
        // do something with the heartbeat here
        break;

      default:
        break;
    }
  }
}
The snippet above in combination with sending every second (1Hz) a Heartbeat message back to GCS via mavlink_msg_heartbeat_pack() would already be a valid MAVLink compatible “vehicle”.
ESP32 Example
You can find on my GitHub a minimal sourcecode to use it as template code for your own MAVLink projects. It supports MAVLink via UDP and Serial. You can easily add new features like GPS and Guided Navigation.
Change the creds.h file with your WiFi credentials.
1
2
#define WIFI_SSID "YOUR_SSID"
#define WIFI_PASS "YOUR_WIFI_PASS"
It’s recommanded to use a static IP address. You can change it in the conf.h file. Don’t forget to set your Groundstation IP address.
1
2
3
4
5
6
7
#define LOCAL_IP 192, 168, 23, 23
#define SUBNET 255, 255, 255, 255
#define GATEWAY 192, 168, 23, 1
#define LOCAL_PORT 14500

#define GROUNGSTATION_IP "192.168.23.2"
#define GROUNDSTATION_PORT 14550
And change the status LED pins to your need.
1
2
#define LED_GREEN 16
#define LED_RED 17
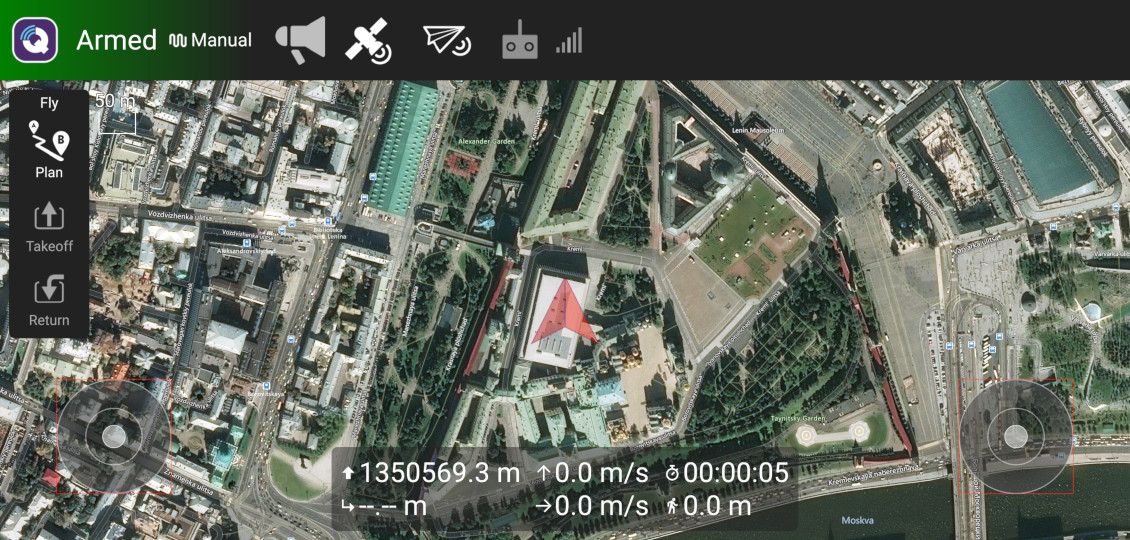
After successfully flashing the firmware to ESP32 and connecting to your network, the vehicle can easily be controlled in QGroundControl via (virtual or hardware) Joystick. QGroundControl is open source, crossplatform and works on all major platforms including Android and iOS.