
TL;DR Pull
RSTpin 11HIGHbeforeEthernet.begin(). Optionally pullSSpin 10LOWbeforeEthernet.begin()andHIGHafterwards.
Prevously I wrote about the madness I had with several Ethernet Modules and Shields.
Through my journey to find the “best” Arduino compatible Ethernet Shield, I found a very nice and promising Arduino Board with a built-in ethernet.
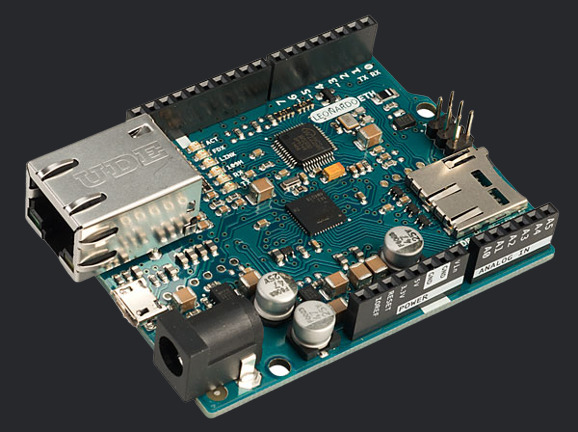 Since the price was decent, I decided to give RobotDyn Arduino Leonardo Ethernet with W5500 Chip and PoE a try. It’s based on the original Arduino Leonardo ETH.
I ordered two boards without PoE. Unfortunately the boards were laying around for a long time, because I couldn’t figure out how to use the ethernet functionality.
I used PlatformIO and tried different ethernet libraries like Ethernet, Ethernet2 and Ethernet3 with no success.123
I didn’t even bother to try out Arduino IDE. PlatformIO is in my opinion much more advanced and mature. I was about to give up after digging into Arduino.h and pins_arduino.h without any success and trying for hours different libraries and example sourcecodes that I came across online.
Finally I found some hints in a five year old and weird GitHub repository of RobotDyn.4
PlatformIO + RobotDyn Leonardo ETH
I uploaded a working UDP Server example to Github. You can assign a static IP address and connect to it via netcat or other UDP client on port 8888.
By pulling the RST pin 11 HIGH before Ethernet.begin() function, ethernet worked without any issues.
1
2
3
4
5
6
7
8
//#define CS  4   // SD CS
#define SS  10  // W5500 CS
#define RST 11  // W5500 RST

pinMode(RST, OUTPUT);
digitalWrite(RST, HIGH);

Ethernet.begin(mac, ip);
Optionally you can pull SS pin 10 LOW before Ethernet.begin() and HIGH after the function to select Ethernet. To switch to SD you need to pull CS pin 4 LOW. Unfortunately I didn’t had much time to test it myself.
Conclusion
Personally I prefer Leonardo Ethernet over Ethernet Shield for Arduino Uno. The ethernet chip of the Leonardo Ethernet W5500 differs to the Arduino Uno’s (Clone) Ethernet Shields W5100 and has more functionalities.
Instead of the ATmega328P microcontroller of the Arduino Uno, Leonardo uses the ATmega32u4 microchip. A main advantage is to program the Arduino Leonardo (and Micro) as a HID device.
In other words, we can build a Keyboard/Mouse device with Network connectivity for upcoming cool projects.
One of it will be a dual controller for Software Groundstations like MissionPlaner and QGroundControl that takes the inputs of a Joystick or Gamepad to control the vehicle.
With a press of a button we will be able to switch from a HID Joystick to a MAVLink standalone Hardware Groundstation via UDP packets.
Stay tuned!