This blog post is a tribute to all those out there that resist and fight against tyranny.
Skip to RNode LoRa TNC installation.
AirChat and Fldigi
Around nine years ago I stumbled over a Vice news article that reported about “Anonymous’ New Walkie Talkies Use Radio Waves to Access the Internet”.1 That caught quickly my attention. I wanted to know how they did it and what techniques were used to achieve it.

Lulzlabs released 2014 AirChat on Github.2 It is written in Perl and uses fldigi in the background to handle the (de)modulation for the radio communication. Just connect your computer soundcard with a conventional VHF/UHF radio and fldigi deals with the rest.
This was the first time I looked closer into Packet Radio and file transfer via radio signals. fldigi seemed to be the perfect software to begin with. Unfortunately I immediately got bored of AirChat. I looked into fldigi and done several tests with two cheap radios that supported VOX.
It’s tedious and not user friendly for people with less technical skills.
Arab Spring and Russian annexation
Four years prior to the release of AirChat, the Arab Spring3 gained momentum. It seemed that Lulzlabs (besides trolling) genuinely wanted to help citizens in countries like Tunesia, Lybia, Egypt, Syria and Latin America.
Previous mistakes regarding communication should not be repeated again. The group mentioned the help of amateur radio operators for selecting the right software. This is how they settled on fldigi.
Back then, only a handful amateur radio enthusiasts would show publicly their support for those countries mentioned above.
With the current war in Ukraine and the Russian aggression, many amateur radio operators show openly their support for Ukraine and are willing to help and contribute their part for the freedom of Ukraine.
Off-grid and decentralized
Modern day alternatives to AirChat are Meshtastic and disaster.radio. Both rely on radio communication technique LoRa4 and Espressif’s ESP32/ESP8266 microcontroller. They are robust, take over the heavy lifting of hardware and software setup and are ready to use.
The disaster.radio project seems inactive for a long time, however Meshtastic is very popular and active. It has very handy features like ATAK forwarder5 and comes with a bunch of cross-platform clients, especially Smartphone Apps.6
However, there is some firmware out there that is far more superior.
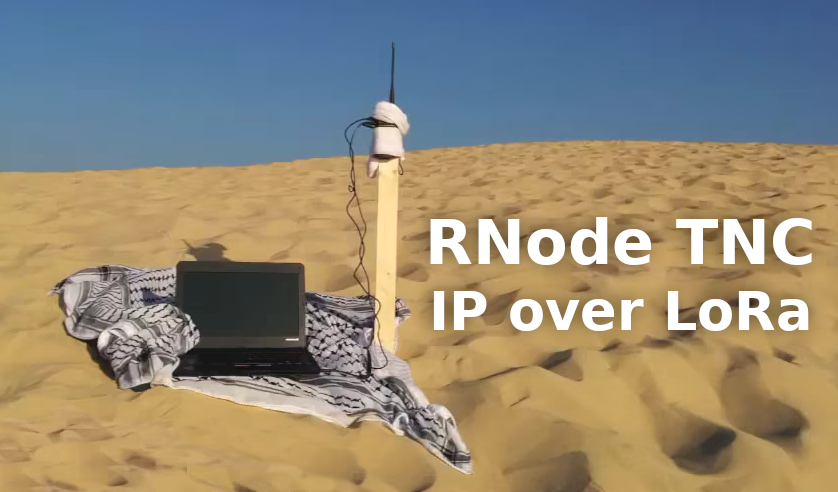
RNode as LoRa TNC
If there is something that gives me a high amount of dopamine rush, then it is when I see someting exciting like RNode and the hardware ready on my bench and the installation, configuration and testing work flawlessly.
You don’t need to order new hardware. You don’t have to wait days for delivery. It just works!
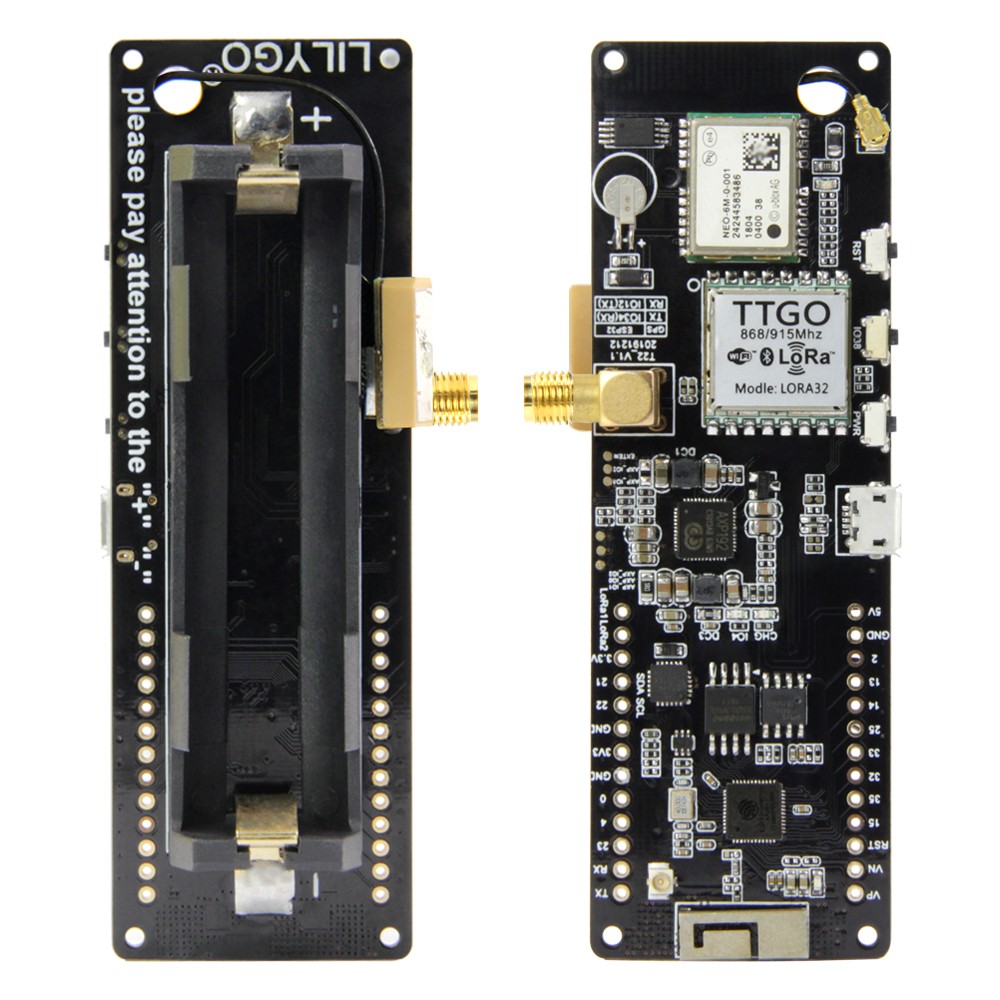
This is what excatly happend. I setup in less then ten minutes two LilyGo TTGO T-Beam v1.1 with the RNode firmware and configured them to operate in TNC Mode. One TNC modem was connected to my test laptop (Side A) and the other one to my newly setup remote SDR server (Side B).7
 Here is a list of other supported hardware:
- LilyGo TTGO T-Beam v1.1
- LilyGo LoRa32 v2.0 devices
- LilyGo LoRa32 v2.1 devices
- Heltec LoRa32 v2 devices
- RNodes based on generic ESP32 boards
- Original RNode from unsigned.io
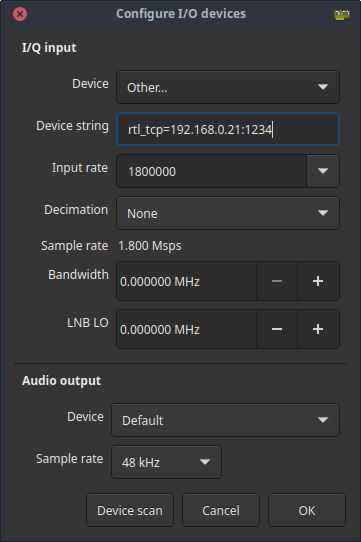
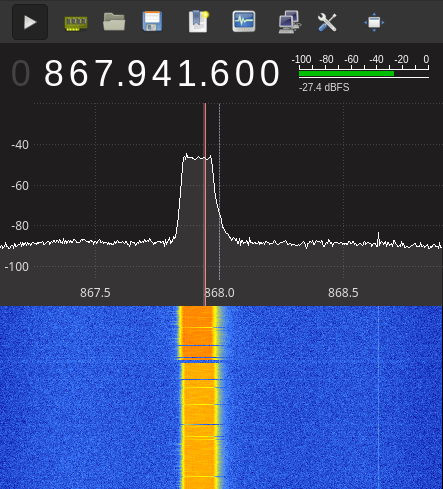
My server has also a RTL-SDR USB dongle plugged in. rtl_tcp is running on port 1234. This makes connecting Gqrx remotely very easy. I can monitor the radio spectrum from far away.
Install RNode firmware
Installation RNode is very straight forward. All you need is python3 and python3-pip.
1
2
$ sudo apt install python3-pip -y  # install python-pip
$ pip install rns                  # install rnodeconf
After installing rns successfully, we can start the rnodeconf installer.
1
$ rnodeconf --autoinstall          # install firmware on supported device
The installer will ask you a couple of questions about your device. It will download and install the firmware automatically. Don’t forget to repeat the same process for the second device!
Assuming the device is named /dev/ttyUSB0, we can start configuring it into TNC Mode with -T. The frequency can be set with --freq and the bandwidth with --bw.
1
$ rnodeconf /dev/ttyUSB0 -T --freq 868000000 --bw 125000 --txp 2 --sf 7 --cr 5
We use the same command and settings on the second device.
RNode as TNC for Linux (Point-to-Point)
To bind the TNC to our linux system as a network interface tnc0, we need to download and compile tncattach. Remember we need to do that on both sides.
1
2
3
4
5
$ sudo apt install build-essential
$ git clone https://github.com/markqvist/tncattach.git
$ cd tncattach
$ make
$ sudo make install
On the Side A:
1
2
3
$ # first install tncattach
$ sudo tncattach /dev/ttyUSB0 115200 -d --noipv6 --noup --mtu 276
$ sudo ifconfig tnc0 10.0.0.1 pointopoint 10.0.0.2
On the Side B:
1
2
3
$ # first install tncattach
$ sudo tncattach /dev/ttyUSB0 115200 -d --noipv6 --noup --mtu 276
$ sudo ifconfig tnc0 10.0.0.2 pointopoint 10.0.0.1
If everything worked well you can check with ifconfig tnc0 if the network is up and running. Let’s make a test by pinging form Side A (10.0.0.1) to Side B (10.0.0.2):
1
2
3
4
5
6
7
8
9
10
11
$ ping -c 5 10.0.0.2
PING 10.0.0.2 (10.0.0.2) 56(84) bytes of data.
64 bytes from 10.0.0.2: icmp_seq=1 ttl=64 time=437 ms
64 bytes from 10.0.0.2: icmp_seq=2 ttl=64 time=443 ms
64 bytes from 10.0.0.2: icmp_seq=3 ttl=64 time=445 ms
64 bytes from 10.0.0.2: icmp_seq=4 ttl=64 time=442 ms
64 bytes from 10.0.0.2: icmp_seq=5 ttl=64 time=451 ms

--- 10.0.0.2 ping statistics ---
5 packets transmitted, 5 received, 0% packet loss, time 4004ms
rtt min/avg/max/mdev = 436.584/443.679/451.235/4.738 ms
How about a nmap port scan?
1
2
3
4
5
6
7
8
9
10
11
12
13
$ nmap -sV -p22,80,1234 10.0.0.2
Starting Nmap 7.80 ( https://nmap.org ) at 2023-05-23 06:27 EDT
Nmap scan report for 10.0.0.2
Host is up (0.72s latency).

PORT     STATE  SERVICE VERSION
22/tcp   open   ssh     OpenSSH 8.9p1 Ubuntu 3ubuntu0.1 (Ubuntu Linux; protocol 2.0)
80/tcp   open   http    nginx 1.18.0 (Ubuntu)
1234/tcp open   tcpwrapped
Service Info: OS: Linux; CPE: cpe:/o:linux:linux_kernel

Service detection performed. Please report any incorrect results at https://nmap.org/submit/ .
Nmap done: 1 IP address (1 host up) scanned in 46.16 seconds
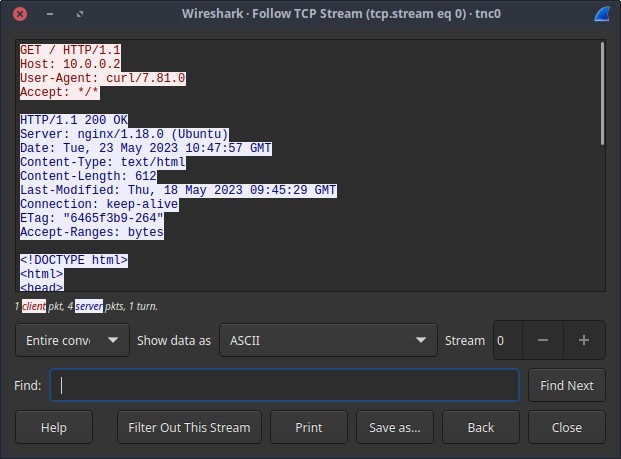
Port 80 is open. Let’s test curl.
1
2
3
4
5
6
7
8
9
10
11
12
13
14
15
16
17
18
19
20
21
22
23
24
25
26
$ curl http://10.0.0.2
<!DOCTYPE html>
<html>
<head>
<title>Welcome to nginx!</title>
<style>
    body {
        width: 35em;
        margin: 0 auto;
        font-family: Tahoma, Verdana, Arial, sans-serif;
    }
</style>
</head>
<body>
<h1>Welcome to nginx!</h1>
<p>If you see this page, the nginx web server is successfully installed and
working. Further configuration is required.</p>

<p>For online documentation and support please refer to
<a href="http://nginx.org/">nginx.org</a>.<br/>
Commercial support is available at
<a href="http://nginx.com/">nginx.com</a>.</p>

<p><em>Thank you for using nginx.</em></p>
</body>
</html>
Excellent! We can now login via ssh over LoRa to our remote server.
 Keep in mind to use SSH keys and the
 -C parameter to compress the traffic. Instead of SSH you can also try mosh.
Every packet that passes through tnc0 is not encrypted transparently. Do not use this setup for sensible data unless you know what you do!
WireGuard for traffic encryption
My friend YD1RUH demonstrated how to use WireGuard to encrypt the whole network traffic.8 This is optional but gives you an additional security and privacy, especially if you don’t use encrypted protocols like SSH or HTTPS.
Installing and setting up WireGuard or Point-to-Multipoint (Ethernet Mode) is out-of-topic and we can look at it another time.
Sources
Shout out to LilyGo for the awesome product, unsigned.io for the amazing firmware and thanks to my friend YD1RUH for helping me a lot.